Bride getting ready photos
We are two wedding photographers that love wedding photography. We have put together a list of essential ‘bride getting ready photos’ that you should have taken on your big day.
Wedding Dress On The Hanger
A photo of the wedding dress on the hanger captures the beauty and elegance of the dress before it is worn by the bride. Here are some reasons why we take this photo:
- It captures the details: Photographing the dress on the hanger captures the intricate details of the dress, such as the lace, beading, and embroidery. These details may be more difficult to see when the dress is being worn by the bride.
- It sets the tone: A photo of the wedding dress on the hanger can set the tone for the entire wedding day, creating a sense of anticipation and excitement for the bride and her bridal party.
- It’s a beautiful keepsake: A photo of the wedding dress on the hanger can be a beautiful keepsake for the bride to treasure for years to come. It serves as a reminder of the beauty and elegance of the dress, and of the special memories associated with the wedding day.

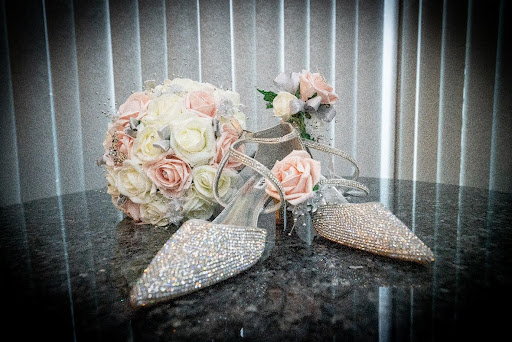
2. The Bridal Shoes
- Look for interesting angles: Experiment with different angles to capture the shoes in an interesting way. Try shooting from a low angle to show off the details of the shoes, or from above to create a flat lay image.
- Use natural light: Look for a location with plenty of natural light, such as a window or a bright outdoor area. Avoid harsh, direct sunlight that can create unflattering shadows.
- Set the scene: Consider including other elements of the bride’s wedding day ensemble in the shot, such as her dress or bouquet. This can help tell a story and create a cohesive image.
- Use props: Consider incorporating props, such as the wedding invitation or a piece of jewelry, to add interest and depth to the image.
- Pay attention to details: Be sure to capture the small details of the shoes, such as the texture of the fabric, the color of the heel, or any embellishments.
3. The Bride Receiving a Wedding Gift
- Look for interesting angles: Experiment with different angles to capture the shoes in an interesting way. Try shooting from a low angle to show off the details of the shoes, or from above to create a flat lay image.
- Use natural light: Look for a location with plenty of natural light, such as a window or a bright outdoor area. Avoid harsh, direct sunlight that can create unflattering shadows.
- Set the scene: Consider including other elements of the bride’s wedding day ensemble in the shot, such as her dress or bouquet. This can help tell a story and create a cohesive image.
- Use props: Consider incorporating props, such as the wedding invitation or a piece of jewelry, to add interest and depth to the image.
- Pay attention to details: Be sure to capture the small details of the shoes, such as the texture of the fabric, the color of the heel, or any embellishments.

4. Morning Bucks Fizz or Champagne
- This may feature the bride standing or sitting in a cozy room, surrounded by her bridesmaids and family members. She may be holding the gift in her hands or opening it with a look of surprise and delight on her face. We sometimes may capture the moment from a distance, creating a sense of intimacy and warmth.
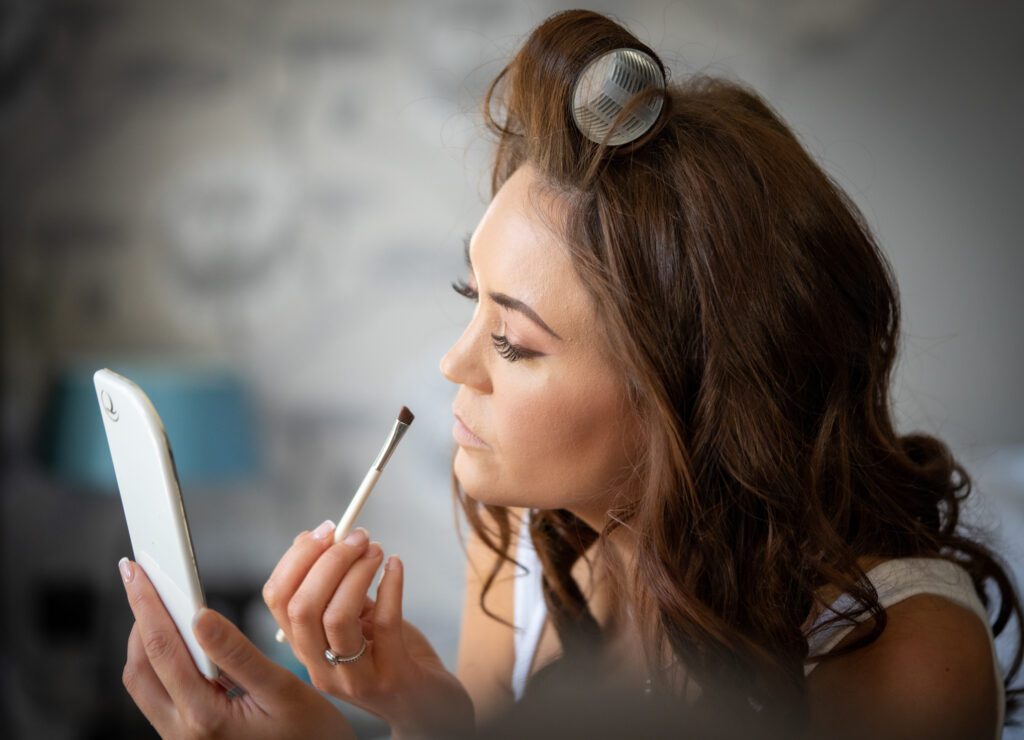
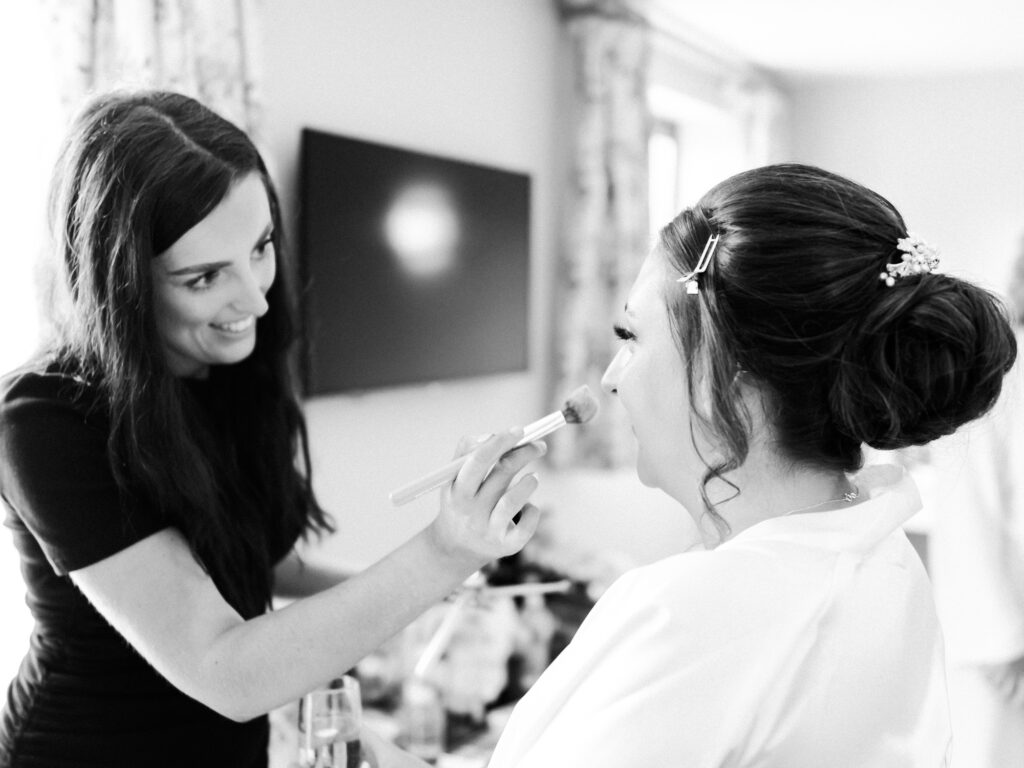
5. Bride and Bridesmaids Makeup
- Capture the process: Take photos of the makeup artists applying the makeup to the bride and bridesmaids. Focus on the details, like the brushes, products, and techniques used. This can add an interesting element to your photos and help tell the story of the getting-ready process.
- Get candid shots: Don’t be afraid to capture candid moments of the bride and bridesmaids laughing, chatting, or reacting to their makeup. These shots can be some of the most authentic and memorable.
- Use natural light: Whenever possible, use natural light to illuminate your subjects. Position the bride and bridesmaids near a window or in a well-lit room for the best results.
- Pay attention to composition: When taking photos of the bride and bridesmaids, consider the composition of your shots. Try different angles and positions to create interesting and dynamic images.
- Coordinate with the makeup artists: Work with the makeup artists to coordinate your shots. Ask them to pause and adjust their positions when necessary to ensure that you can get the shots you need without getting in their way.
Remember to be respectful and considerate of the bride and bridesmaids throughout the process. Try to be as unobtrusive as possible and avoid interrupting their experience. With a little planning and attention to detail, you can capture some beautiful and memorable photos of the bride and bridesmaids getting their makeup done.
6. The Brides Jewellery
- Find a well-lit area: Look for a spot with plenty of natural light to capture the details of the jewelry and the bride’s face. Avoid harsh, direct sunlight or artificial light that can cast unflattering shadows.
- Use a shallow depth of field: Set your camera to a wide aperture (such as f/1.4 or f/2.8) to create a blurred background and draw attention to the jewelry and the bride’s hands.
- Capture the process: Take photos of the bride laying out her jewelry, adjusting it in the mirror, and putting it on. These shots can help tell the story of the day and capture the emotions of the moment.
- Get close-ups: Use a macro lens or zoom in to capture the details of the jewelry, such as the sparkle of diamonds or the intricate design of a necklace.
- Direct the bride: As the photographer, you can help guide the bride through the process of putting on her jewelry, suggesting poses or angles that will look great on camera.
7. The Bridemaids seeing the Brides in her Dress for the First Time
- Set the scene: Find a location that is well-lit and has a clean background. Consider using a natural or neutral background to keep the focus on the bride and her dress.
- Capture the reactions: Take photos of the bridesmaids as they see the bride in her dress for the first time. Try to capture candid and natural expressions, as well as the interactions between the bridesmaids and the bride.
- Use a fast shutter speed: To capture sharp images of the bridesmaids’ reactions, use a fast shutter speed, such as 1/500 or higher.
- Direct the bridesmaids: As the photographer, you can help guide the bridesmaids through the process, suggesting poses or angles that will look great on camera.
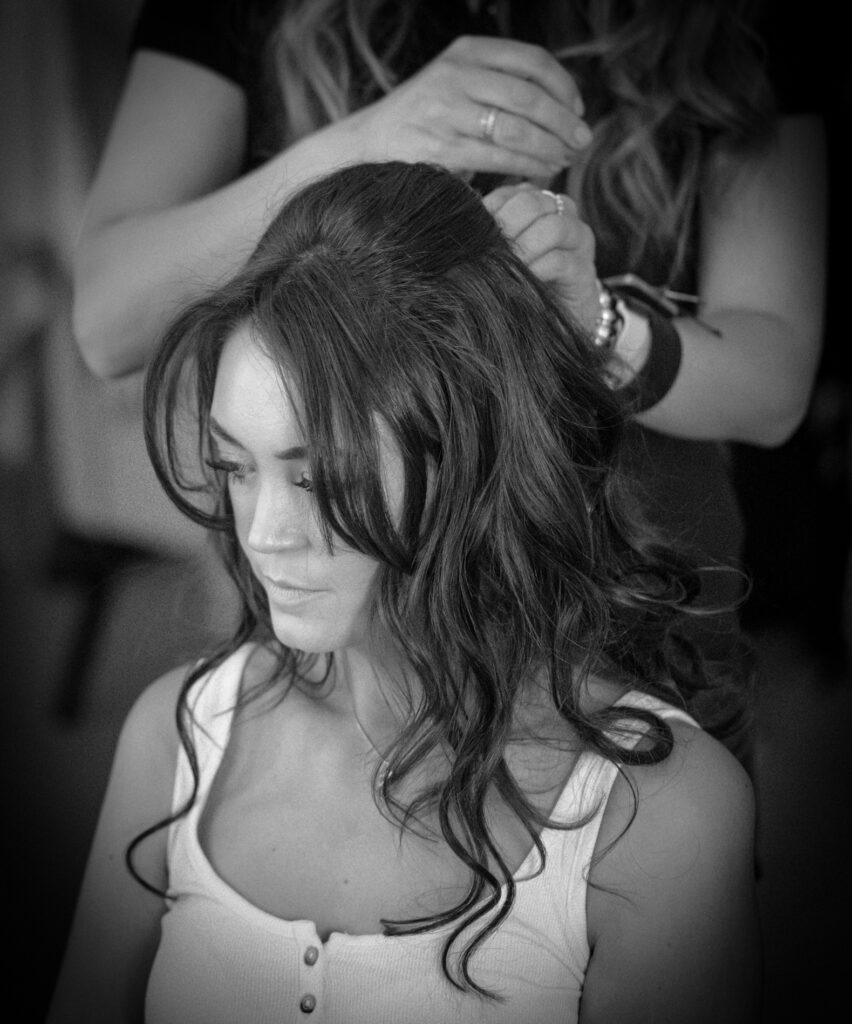
8. Hairsyling
- Be unobtrusive: As the photographer, try to be as unobtrusive as possible. Don’t interrupt the hair stylist or get in the way of their work.
- Capture the process: Take photos of the different stages of the hair styling process, from the initial consultation to the finished look. This can help tell a story and capture the full experience.
- Use natural light: Look for a location with plenty of natural light, such as near a window or outside. Avoid harsh, direct sunlight that can create unflattering shadows.
- Vary your angles: Experiment with different angles and perspectives to capture the moment from multiple viewpoints. Consider shooting from a low angle to show the details of the hair styling, or from a higher angle to capture the bride’s expression.
- Capture the details: Be sure to capture the small details of the hair styling, such as the texture of the hair, the placement of the pins, or any accessories that are being used.
9. All the Accessories Laid Flat
- Choose a clean, neutral background: Find a clean, neutral background that won’t distract from the accessories. A white or light-colored surface can work well.
- Use natural light: Look for a location with plenty of natural light, such as near a window or outside. Avoid harsh, direct sunlight that can create unflattering shadows.
- Arrange the accessories thoughtfully: Consider how you want to arrange the accessories in the shot. You could group them together in a cluster or arrange them in a line. Think about the balance of the items and the composition of the shot.
- Get in close: Use a macro lens or zoom in to capture the details of the accessories, such as the texture of the fabric, the sparkle of the jewellery, or the pattern on the tie.
10. Bride in the Mirror
- Find a full-length mirror: Look for a full-length mirror in a room with plenty of natural light. Ideally, the mirror should be positioned so that you can stand back far enough to capture the full length of the dress.
- Position the bride: Have the bride stand in front of the mirror, facing the mirror with her back to you. She can hold her bouquet or place her hands on her hips for a more natural pose.
- Stand back: Stand back far enough from the mirror to capture the full length of the dress. You may need to adjust your position to avoid capturing your reflection in the mirror.
- Focus on the dress: Use your camera to focus on the dress, making sure to capture both the front and back of the dress. You may need to adjust the angle of your camera to get the best shot.
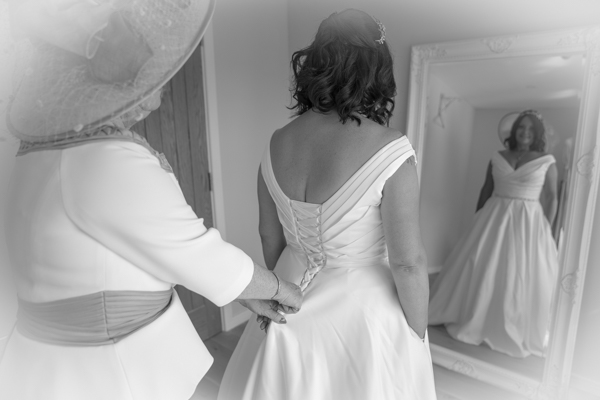
11. Mother Doing up the Back of the Dress
- Position the mother and bride: Have the mother stand behind the bride and assist with doing up the back of the dress or adjusting the veil. Make sure that both the mother and bride are in a comfortable position and that the bride’s face is visible.
- Get close: Move in close to the bride and mother, so that you can capture the details of the dress and veil. Use a zoom lens if you need to get closer without invading their personal space.
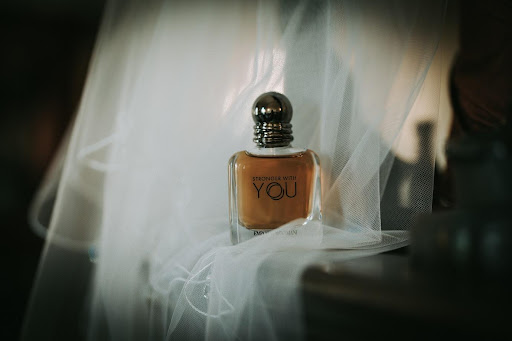
12. Brides Perfume
- Positioning: The position of the bride while putting on perfume can be important to the photo. You may want to position her in front of a window or a light source to create a nice silhouette effect.
- Details: Try to focus on the details of the perfume bottle and the bride’s hands as she applies the perfume. This will help to create an intimate and personal photo.
- Facial expression: Pay attention to the bride’s facial expression as she applies the perfume. Capture her in a moment of concentration or enjoyment.
- Background: Consider the background of the photo. A simple and uncluttered background will help to emphasize the bride and the perfume.
- Lighting: Use lighting to your advantage. A soft, diffused light will create a flattering effect on the bride’s face and skin.
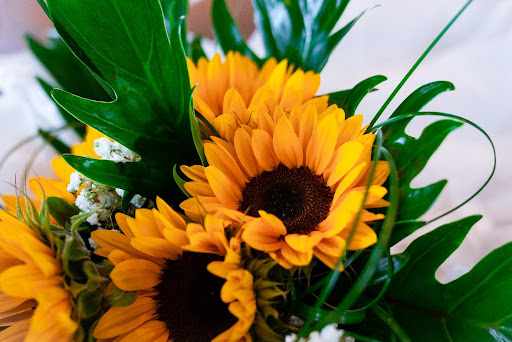
13. Bridesmaid Flowers
- Arrange the flowers thoughtfully: Consider how you want to arrange the flowers in the shot. You could group them together in a cluster or arrange them in a line. Think about the balance of the flowers and the composition of the shot.
- Get in close: Use a macro lens or zoom in to capture the details of the flowers, such as the texture of the petals, the color of the blooms, and the shape of the leaves.
14. The Bridal Bouquet
- Find a suitable background: Look for a plain or uncluttered background that won’t detract from the bouquet. A solid wall or a natural landscape can make a great backdrop.
- Use natural light: Take advantage of natural light as much as possible. Place the bouquet near a window or shoot outdoors during the golden hour (the hour before sunset or after sunrise) for soft, warm lighting.
- Use a macro lens: A macro lens will allow you to capture the details of the bouquet, such as the texture of the petals and the individual flowers.
- Play with composition: Consider using the rule of thirds, leading lines, or framing to create a visually pleasing composition.
- Take multiple shots: Take several shots of the bouquet from different angles and compositions to ensure you have a variety of options to choose from.
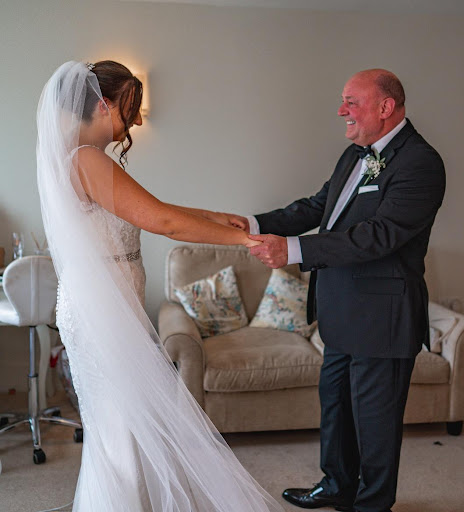
15. The Father of the Bride Seeing the Bride for the First Time
- Be prepared: Make sure you know where the bride and her father will be entering from and position yourself accordingly. Check the lighting and make any necessary adjustments to your camera settings beforehand.
- Use a long lens: Using a longer lens (such as a 70-200mm) will allow you to stay at a distance and capture candid shots without being intrusive.
- Be ready for the emotions: This is a very emotional moment, so be prepared to capture a range of emotions, from tears to laughter.
- Take multiple shots: Take multiple shots to ensure you capture the perfect moment. You can always delete any shots that don’t turn out well later.
16. Transport Arrival
- Position yourself in the right location: Scout the location beforehand and find the best spot to capture the car’s arrival. Consider the lighting and the background, and choose a spot that allows you to capture the car as it approaches.
- Use a fast shutter speed: Set your camera to a fast shutter speed to freeze the motion of the car and capture it as it arrives. A shutter speed of at least 1/500th of a second is recommended.
- Focus on the details: Pay attention to small details like the car’s decorations or the bride’s dress as she enters the car. These details can add depth and interest to your photos.
17. Father Helping Bridge into Wedding Car
- Set up the shot: Position yourself at an angle to the car so that you can capture both the father and the bride. The father should be standing at the open door of the car, while the bride stands beside him.
- Focus on the subjects: Use your camera or phone to focus on the father and the bride. Make sure they are both in focus and that the framing is just right.
- Capture the emotion: Make sure you capture the emotion of the moment, such as the father’s proud smile or the bride’s happy tears.
18. Stationery Flat Lay
- Choose a clean and clutter-free surface: Start by selecting a clean, flat surface such as a wooden table, marble countertop or any other appropriate surface that complements the wedding theme and colours. We use a special vinyl mat that we take to each wedding just in case we can’t find an appropriate surface.
- Gather the details: Collect all the details and decor elements you want to photograph and arrange them on the surface in an aesthetically pleasing way. This can include the wedding rings, invitation suite, flowers, ribbons, and any other decor elements.
- Use props: Consider adding props such as candles, small flower arrangements, or other items that complement the wedding theme and decor.
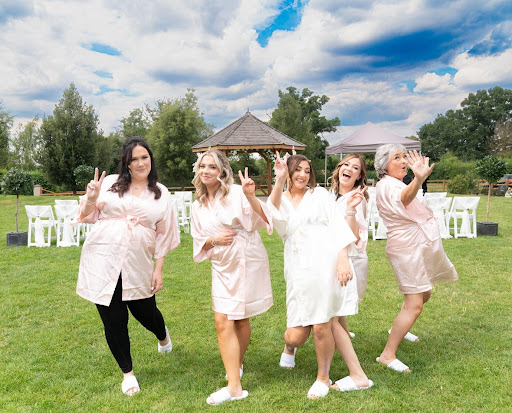
19. Everyone in their Robes
- Set the scene: Choose a well-lit room or a location with plenty of natural light. Make sure the room is clutter-free and that the PJs or robes complement the wedding theme and colors.
- Arrange the group: Position the bride and bridesmaids in a way that creates a natural-looking group shot. This can include arranging them in a circle or line, or having them sit or stand in a way that feels comfortable and relaxed.
- Use natural poses: Encourage the bride and bridesmaids to pose in a way that feels natural and relaxed. This can include laughing, chatting, or holding their drinks or accessories in a casual way.
- Consider the framing: Consider the framing of the shot and how you can incorporate the environment around the group. You can include a window, a mirror, or other elements to create a more interesting composition.
- Use props: Consider adding props such as champagne glasses, flowers, or other elements that complement the wedding theme and add to the fun and relaxed atmosphere of the shot.
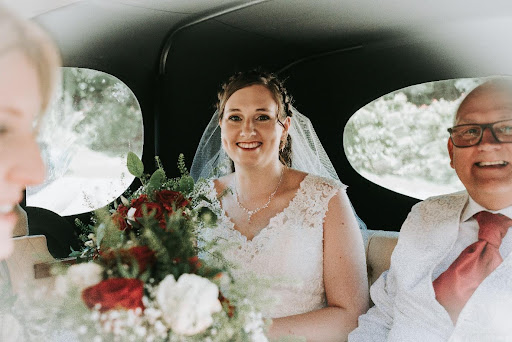
20. Bride in Back of Car from the Front Seat Looking Back
- Open the car door: Open the car door on the opposite side of the bride so that you can shoot from the front seat.
- Position yourself: Position yourself in the front seat of the car and frame the shot so that the bride is in the centre of the frame. Use the rearview mirror to help position the shot.
- Direct the bride: Direct the bride to look towards the camera or in a direction that creates a natural and relaxed pose. You can also direct her to adjust her hair or dress for the best possible shot.
21. Shot of Bride Through Car Window
- Roll down the window: Roll down the window closest to the bride so that you can get a clear shot. If the bride is sitting in the back seat, you may need to open the back door to get a better angle.
- Use a polarising filter: A polarising filter can help reduce glare and reflections on the car window, which can make the photo look clearer and more professional.
- Direct the bride: Direct the bride on how to pose and where to look. You may need to move around the car to get different angles and shots.
- Focus on the bride: Focus on the bride, capturing her natural expression and beauty. You can also try different angles and poses to add variety to the shots.
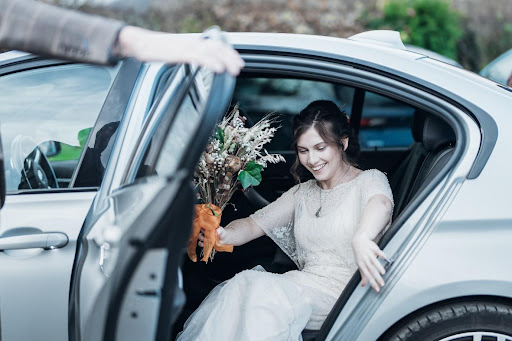
22. Bride Travelling to the Wedding
- Plan ahead: Communicate with the bride about the mode of transportation she’ll be using to travel to the wedding, and make sure you arrive early to set up your equipment.
- Take candid shots: Capture candid moments of the bride traveling to the wedding, such as her looking out of the window or chatting with her bridesmaids or family members.
- Take advantage of the environment: Incorporate the environment into your shots, such as the city skyline or countryside scenery.
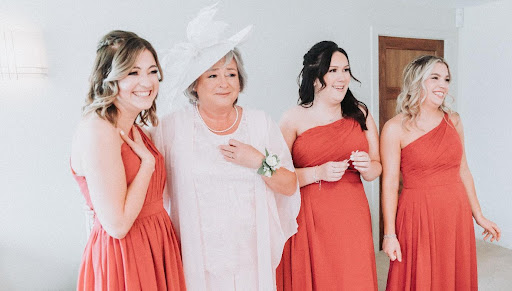
23. Wedding Party Once Ready
- Capture individual shots: Take individual pictures of each member of the bridal party, including the bride. This can include headshots, full-length shots, and candid shots.
- Take group shots: Take a variety of group shots of the bridal party, including full-length and half-length shots. Experiment with different compositions and poses to find the most flattering angles.
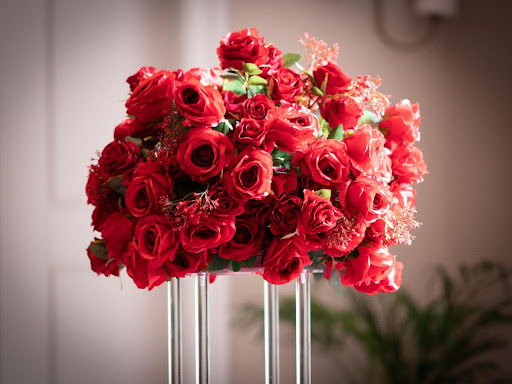
24. Wedding Flowers
- Find a good background: Look for a background that complements the colors and textures of the flowers, such as a plain wall or a garden setting.
- Use natural light: Whenever possible, use natural light to illuminate your shots. This can create a soft and flattering look that complements the delicate beauty of the flowers.
- Use a macro lens: A macro lens can help you capture the intricate details and textures of the flowers.
- Focus on the details: Take pictures of the individual flowers, as well as the entire floral arrangements. This can include close-up shots of the petals, the stamens, and other details.
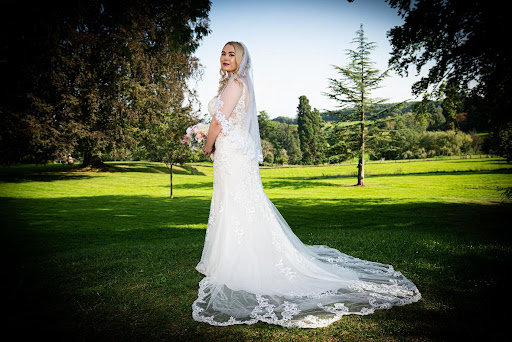
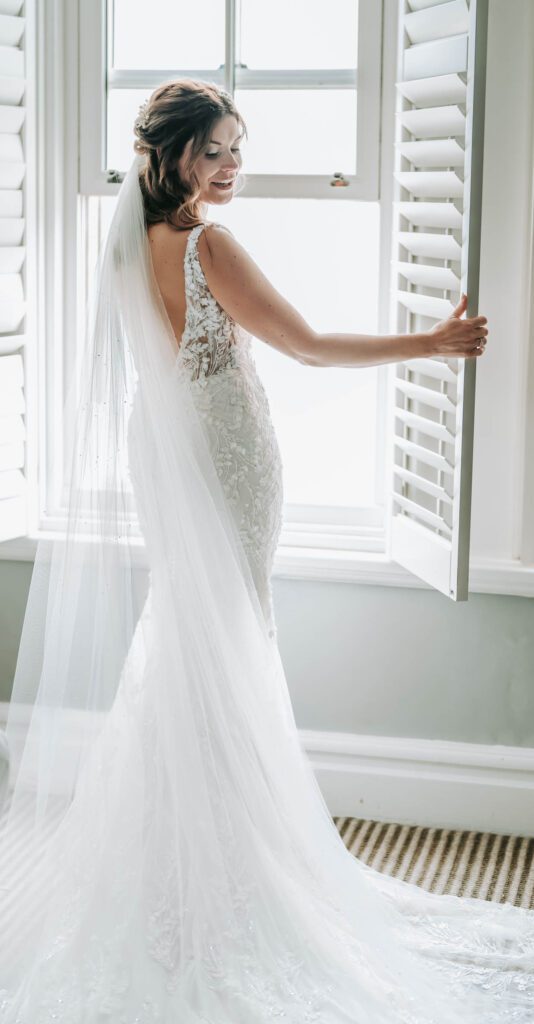
25. Back of the Bride's Wedding Dress
- Position yourself in the right location: Scout the location beforehand and find the best spot to capture the car’s arrival. Consider the lighting and the background, and choose a spot that allows you to capture the car as it approaches.
- Use a fast shutter speed: Set your camera to a fast shutter speed to freeze the motion of the car and capture it as it arrives. A shutter speed of at least 1/500th of a second is recommended.
- Focus on the details: Pay attention to small details like the car’s decorations or the bride’s dress as she enters the car. These details can add depth and interest to your photos.
Get in touch with us today
If you are in need of a photographer and want to discuss your wedding further then get in touch with us today and we will be happy to help.